Tuesday 20 February 2018

[#Blogged]Granular Locking in Salesforce

Granular Locking in Salesforce

The system employs additional logic to allow multiple updates to proceed simultaneously if there is no hierarchical or other relationship between the roles or groups involved.

For example: if you trying to edit the user details but on the other hand automated process is already doing that then you are not allowed to edit.

for this we use granular locking, this will not lock the entire table but only specific data.

What are the key advantages of granular locking?

1) Groups that are in separate hierarchies can be manipulated concurrently

2) Public groups and roles that do not include territories can be manipulated concurrently

3) Users can be added concurrently to territories and public groups

4) User provisioning can occur in parallel

5) A single-long running process, such as a role delete, only blocks a small subset of operations

Benefits to customers:

Customers who frequently experience locking that restricts their ability to manage manual and automated group maintenance operations.
Enable granular locking, which attempts to lock only the modified portions of the table. This can improve the performance of the following items:
1) Adding/deleting/transferring user from a territory
2) Re-parent a territory
3) Create or delete a territory within a hierarchy
4) Adding or removing a forecast manager


Check the below link for more information
https://resources.docs.salesforce.com/sfdc/pdf/draes.pdf

Saturday 10 February 2018

[#Blogged] Salesforce Non-Profit #Trailhead Badge158

Challenge #1: Accounting in nonprofit settings involves significant complexity.
Challenge #2: Nonprofits must be vigilant stewards of donated monies and carefully monitor what they spend on every initiative and program.
Challenge #3: No two funds or grants are alike, creating extraordinary complexity in nonprofit accounting.
Challenge #4: Nonprofits face stringent requirements for reporting and transparent operations – and those hurdles are multiplying.
Challenge #5: IT budgets and expertise are scarce and financial management software can sometimes seem like a distracting and risky headache.
What if I verbalize Salesforce can solve all the Challenges in a go.

Lets Quick Start on Salesforce Non-Profit with the Help of Trailhead.


A Salesforce edition is a selected set of features and functionalities that also specifies the amount of customization possible, as well as the data and file storage capacity, and the API access available.
With the Power of Us license donation program, Salesforce.org customers receive 10 "CRM Lightning"(which includes both Sales Cloud Lightning and Service Cloud Lightning) Enterprise Edition licenses at no cost. A license is attached to a single user, so with 10 licenses, you could have 10 users logged on to your Salesforce org at one time.

If you need additional licenses or products, you can purchase them at a deep discount from Salesforce.org.
In addition to your 10 Lightning Enterprise Edition (EE) licenses, you may have also chosen an App that will help you manage donations, grants and volunteers. On the Salesforce.org website, you can choose between two trials - the standard Enterprise Edition and the Nonprofit Success Pack (NPSP). The Nonprofit Success Pack App sits on top of your Lightning EE licenses.
Knowing what edition and what app you are using will be vital information for you to know as you review Salesforce documentation, log a tech support ticket, or ask for help from the community.


Sign Up for a free trial 

Astonishing Blog on NonProfit Success Pack from Salesforce.org by
Ines Garcia on Salesforce Ben.

Salesforce for Nonprofits: Start Minute, Dream Astronomically immenseTracy Kronzak

Product Stories by Salesforce

Salesforce Plus NPSP:

“The Salesforce Plus NPSP” house model looks kindred to “the Salesforce,” because the Nonprofit Success  Pack is just a pre-built version of the base Salesforce model, that integrates and transmutes a few things while leaving basic Salesforce functionality intact.
Accounts, contacts, and opportunities are still the major building blocks. However, each NPSP account represents a household. Each household can be associated with multiple donors (contacts) and donations (opportunities). And since nonprofits may need to track more than donors, they can utilize contacts to manage all kinds of people data—members, volunteers, clients, board members. And they can utilize opportunities to manage grants, in-kind gifts, and memberships—not just donations.


Data Management :

Utilizer Interface
Cognate Objects and Records
Security
Mobile Access

Tap Into the Nonprofit Community :

With your Salesforce.org grant, you get a set of no-cost subscriptions to NPSP, along with access to the Power of Us Hub (authenticate with your NPSP tribulation username and password). The Hub is a portal for members of the Salesforce nonprofit community to collaborate. Whether you implement NPSP on your own or with avail from an implementation partner, you can always turn to the Hub with your questions. Folks in the Hub are agog to learn from and avail other users.

References :
https://trailhead.salesforce.com/modules/nonprofit_salesforce_basics/units/nonprofit_salesforce_learn
http://www.excluserv.com/non-profit-starter-pack/

Tuesday 6 February 2018

[#Blogged] Quick Start: Heroku Connect - #Trailhead Badge157

Heroku is a container-based cloud Platform as a Service (PaaS). Developers use Heroku to deploy, manage, and scale modern apps. Our platform is elegant, flexible, and easy to use, offering developers the simplest path to getting their apps to market.
Heroku is fully managed, giving developers the freedom to focus on their core product without the distraction of maintaining servers, hardware, or infrastructure. The Heroku experience provides services, tools, workflows, and polyglot support—all designed to enhance developer productivity. 

Lets Quick Start on Heroku with the Help of Trailhead.

Prerequisites:

Heroku account
  • Before Deploying an application to Heroku, make sure you have an active Heroku Account.If not, Navigate to https://signup.heroku.com and create a Heroku account.
Contact Custom field  
  • Add a new field to the Contact Object:
  • In Setup, click the Object Manager tab next to the Home tab.
    Click the Contact object.
    Click Fields & Relationships.
    Click New.
    For Data Type, select Text, and click Next.
    Complete the custom field as follows:
    Field Label: External Phone ID
    Length: 10
    Field Name: External_Phone_ID
    Unique: Select Do not allow duplicate values
    External ID: Select Set this field as the unique record identifier from an external system
    Click Next.
Deploy an Application
  1. Login into Heroku Account.
  2.  Deploy the sample Phone Change Application.
  3. Select the United States as the Region, then click Deploy App.
  4. After the app has been deployed, you can manage it in the Heroku Dashboard by clicking the Manage App button and view the app by clicking the View button.

Provision the Heroku Postgres Add-on and Provision the Heroku Connect Add-on

Provision the Heroku Postgres Add-on
Connect, Use, and Develop
Databases are multi-ingress: use them from any cloud, PaaS, or your local computer. It is easy to connect with common languages & frameworks including Rails, Django, PHP, and Java: configuration strings are generated for them automatically.
Scale and Grow
Scale vertically by choosing from a range of plans. Plans differ based on the size of their hot-data-set, the portion of data available and optimized on-the-fly in high-speed RAM. When the time comes, scale horizontally by adding read-only followers that stay up-to-date with the master database.
Starter Steps :

  1.  Click the Manage App button to visit the Heroku Dashboard and click on your new application.
  2.  Click the Resources tab.
  3.  In the search area in the Add-ons section, type Heroku Postgres, click Enter and then click Provision. 
Provision the Heroku Connect Add-on
Seamless Heroku and Salesforce data synchronization
Heroku Connect makes it easy for you to build Heroku apps that share data with your Salesforce deployment. Using bi-directional synchronization between Salesforce and Heroku Postgres, Heroku Connect unifies the data in your Postgres database with the contacts, accounts and other custom objects in the Salesforce database. Easily configured with a point and click UI, it’s simple to get the service up and running in minutes – no coding or complex configuration is required. 
Starter Steps :
  1.  Click the Manage App button to visit the Heroku Dashboard and click on your new application.
  2.  Click the Resources tab.
  3.  In the search area in the Add-ons section, type Heroku Connect, click Enter and then click Provision 
Heroku Connect locates the Heroku Postgres database that you provisioned in the previous step.
  • Click Next and then click Authorize
  • Now set up Heroku Connect.
Authorize Heroku Connect to access your Salesforce Org. Log in to Salesforce with your Trailhead Playground /Developer Org credentials you collected above.
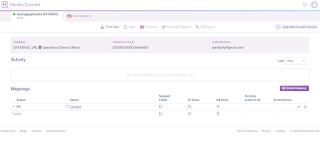
Create a mapping between the Contact object in Salesforce and a table in the Heroku Postgres database.

  • In Heroku, click Create Mapping. Select the Contact object.
    In the Database -> Salesforce section, select the Write database updates to Salesforce using -- None -- as the unique identifier option and choose External_Phone_ID__c from the dropdown list.
  • Click Save.When you've completed the mapping setup, the data begin synchronizing.  
Our application is now syncing (bidirectionally) a subset of the Contact object in Salesforce with a new table in the Heroku Postgres database associated with your app.
When the syncing is complete, open your Heroku app in a new browser tab, by entering http://APP_NAME.herokuapp.com and replacing APP_Name with your app name.

Complete the form and Since you had previously set up the bidirectional sync with Salesforce using Heroku Connect, this should also automatically update the contact record in Salesforce.

References :
 https://elements.heroku.com/addons/heroku-postgresql
https://trailhead.salesforce.com/projects/quickstart-heroku-connect/steps/qs-heroku-connect-1