Showing posts with label Salesforce Admin. Show all posts

Thursday, 15 October 2020

[#Blogged] - Salesforce Administrator Guide: Propelling your Career Forward - Part 9

Part 9: Become a Master of Chatter

In Part 9 of my series on Salesforce Administrator Guide: Propelling your Career Forward, I want to talk about a useful tool that can often be overlooked,even by advanced Admins and companies that have had Salesforce for a while. That awesome tool is called Chatter! 


Chatter is a messenger tool utilized within Salesforce so your end users can better communicate without leaving the platform. Want to leave a note for your manager on a record that can send them an email, notifying them immediately? Need to pull in colleagues from other departments to collaborate on a specific record, such as a customer support case? Or need to send messages automatically via Process Builder on certain records? All of the above - and more - can be done in Chatter. You can have private groups, public groups, and make posts on object records and user records. End users have the ability to dictate how frequently they receive emails on posts, so they’re not feeling overwhelmed. And, you can follow records that are of interest, such as a big customer, or someone you need to keep an eye on. 


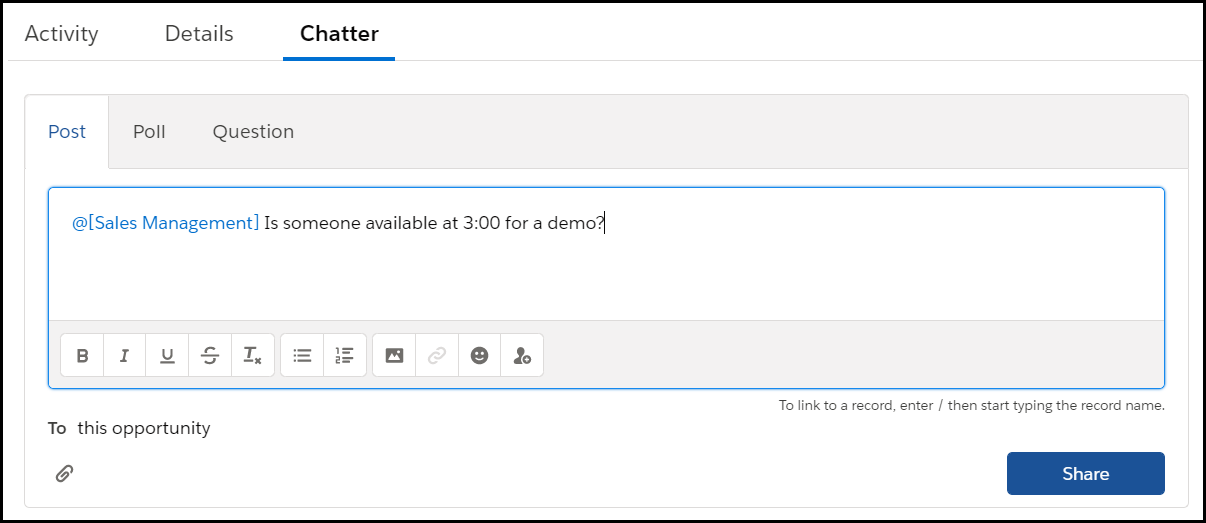
Image: Your Sales team can quickly reach out to a user or group by tagging them on a record


While I could write many posts on the use cases of Chatter, for now, I want to go over how you, as an Admin, can navigate through some of the different areas of Chatter more efficiently. 


How do you turn this thing on?

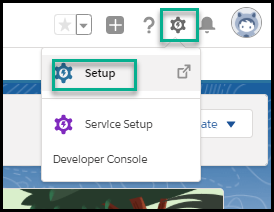
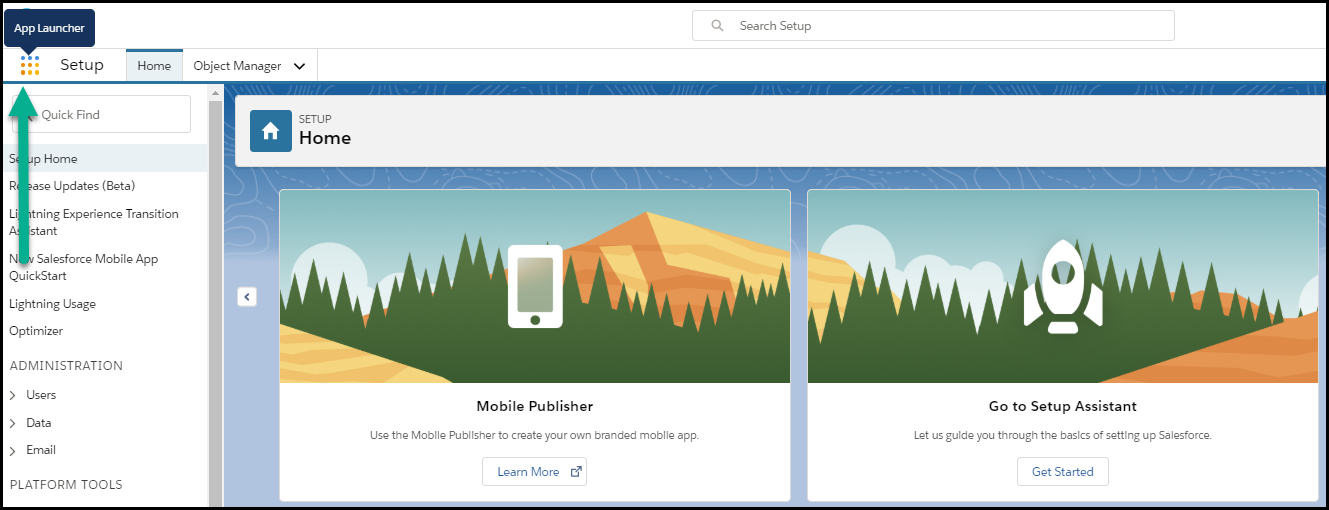
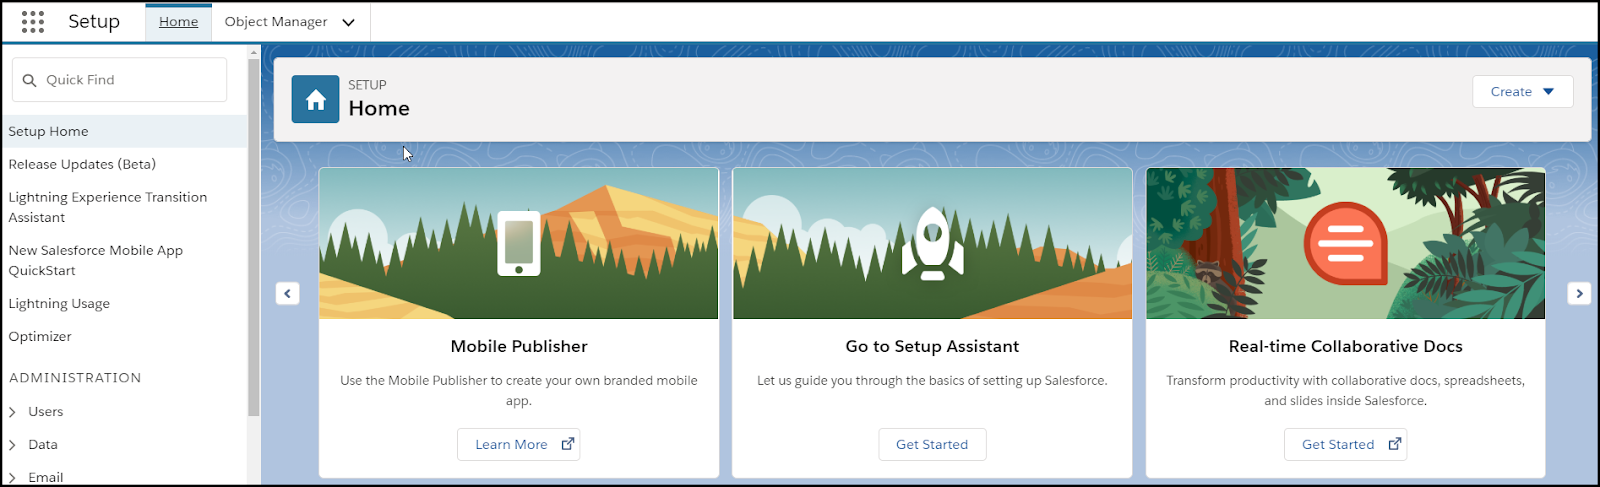
Chatter must be enabled in your org, and there are settings that can be established, as well, before users can jump in and start making posts, questions or polls. By navigating to Setup > Quick Find and searching for “Chatter”, you can quickly find the “Chatter Settings” tab. 


Image: Chatter Settings must be enabled before it can be utilized


This is where you will enable Chatter, if it is not enabled already, and can turn on special features, such as Draft Posts, which allows users to draft instead of sending right away, or allow for approval requests to be sent in chatter as well. There are many other features that make the end user experience more valuable that are nestled here on this page, but this is not the only area of Chatter you should be familiar with. Next, let’s look at the Chatter app itself, and the functionality it contains.


What can I do in the Chatter App?

The Chatter app is where you will spend most of your time when it comes to working within Chatter. The app contains tabs that allow you to set up groups that can be tagged in Chatter (such as the Sales Management group in our first image above), see a list of chatter posts related to records you’re following, and allow you to determine how frequently you see emails related to chatter. In some cases, it makes sense to see every post, but other times, you may only need a daily digest. 


Image: In the Chatter App, you can access groups, people, and how frequently you receive emails from Chatter


Assisting your end users will more than likely occur in the UI, and areas such as the privacy of their posts, how they adjust email notifications for Chatter, and how to tag certain groups. It’s just as important to feel comfortable with the Chatter App as it is with Chatter Settings.


This is just the absolute surface of Chatter, and it’s a great tool to learn. You can find out more in this awesome Trailhead called Chatter for Lightning Experience!


Thursday, 24 September 2020

[#Blogged] - Salesforce Administrator Guide: Propelling your Career Forward - Part 7


Part 7: All about Data Import and Data Export

In Part 7 of our series Salesforce Administrator Guide: Propelling your Career Forward, I want to talk about Data Import and Export.  There will inevitably come a time in your Salesforce Admin career when you will need to handle large amounts of data. Fortunately, this does not mean you will have to spend hours upon hours painstakingly updating each record individually. Whether you will be asked to update large batches of records, or store records periodically for auditing purposes, knowing how to import, export, and manipulate data correctly is a crucial skill to learn early on. Let’s take a look at a few native Salesforce tools that you can utilize to perform these tasks.


Data Import

Importing data is when you take data from another source, such as an excel spreadsheet, and bring that data into Salesforce, matching it appropriately on the records you have already existing. This is referred to as an update. You can also use data import tools to create brand new records, as well.


The Data Import Wizard allows you to import data for both standard and custom objects, as long as the batch sizes are less than 50,000 records. If you have more than that, you can still make updates, but must break down your import into separate batches. 


Image: Data Import Wizard


The Data Import Wizard is fairly easy to use, as long as you have your data appropriately prepared beforehand, and know the API names of the fields you wish to adjust. You can find this tool by searching for “Data Import Wizard” in the Setup > Quick Find menu.

Data Export

There are a few ways to export data from Salesforce into various locations. Although not a tool, per se, an Admin with “Export Reports” permission can choose to create and filter reports to identify necessary information, and export as a .csv file on their computer. This is actually a commonly used step to manipulate data for updates, to be imported back into Salesforce.


There is also a Data Export tool which allows you to set up exports on a schedule. This is great for allowing large amounts of data to be pulled at convenient times of day, such as off-peak hours late at night, so as to not interfere with functionality of your Salesforce org.


And then there’s Data Loader…

Data Loader is also a native tool that does both importing and exporting of data into and out of Salesforce. This is great for loads that the Data Import Wizard cannot handle, and can accommodate up to 5,000,000 records! Data Loader also allows you to update, create or delete records and can be used for objects not available to the Data Import Wizard, as well.


 Image: Data Loader Installation. Find it by Searching “Data Loader” in the Setup > Quick Find menu.


This is not the “end all, be all” list of ways to import and export data, however, it’s a great list to get you started with highly functional tools that are very useful in making the most of your Salesforce journey! 


Thursday, 3 September 2020

[#Blogged] - Salesforce Administrator Guide: Propelling your Career Forward - Part 6

Welcome to Part 6 in my series Salesforce Administrator Guide: Propelling your Career Forward! In Part 6, I want to discuss tools for process automation. As an Admin, you will be asked to not only add fields, or adjust page layouts, but also to implement processes to help your end users get through their day more efficiently. There are a host of tools you can use for various automation requirements, ranging from small and quick to the whole kit and caboodle. Let’s go over three tools for Process Automation, so you can learn how to make your Salesforce org an efficient machine!


Three Tools for Process Automation

Process Automation is not something that should scare you, but should invigorate you. There are a lot of great ways in Salesforce to grab information from one area, populate it in another, or reduce clicks and time spent by your end user. Familiarising yourself with these three tools is essential for taking your career to the next level and can improve your ability to analyse the best options for the job.


Workflow Rules

Workflow rules are great for small, easy changes that have simple requirements and are focused on one object. You can create logic that triggers an action of creating a New Task, New Email Alert, New Field Update, New Outbound Message, or any existing action. In this example, I used a workflow rule to evaluate the Industry field on the Account object to update a separate custom field called “Enterprise Industry”. The action is a field update, which will check the box as “True” if the criteria are met. Quick and easy, Workflow Rules are a great option for these types of automation.


Process Builder

For the past few years, the Process Builder has been the darling of Automation in the world of Salesforce. Due to its ability to execute more actions than a workflow rule, and it's easy to use interface, the Process Builder is a great choice for holding many changes for a single object that need to run upon edit or create. Let’s take the example above for the workflow rule: if you also wanted to add an update for Chatter to go along with your field update, you would set up this scenario in the Process Builder, instead of using a workflow rule. This tool is more versatile and is easy enough for an Admin to use along the various stages of their Salesforce journey.


Flow Builder

This is a more advanced tool, but is one that Admins can still take advantage of, nonetheless. Flow is a step up from Process Builder and is quickly becoming the new favorite tool. Flow has more capabilities all around, is more robust, and is the last step in Admin tools (at the moment) before crossing the threshold into becoming a developer. Flow can do everything from grab records and evaluate before taking action, loop through collections of records to seek or update information, and even make decisions based on input from your end users on a screen. This is worth spending a lot of time exploring and getting some hands-on practice!


Image: Just the tip of the iceberg compared to what this tool can do...


If you can become familiar with those three tools, you can definitely step up your Salesforce skills. Remember, practice is key, so make sure you remain patient, learn from your mistakes, and keep moving forward!


Saturday, 29 August 2020

[#Blogged] - Salesforce Administrator Guide: Propelling your Career Forward - Part 5


Part 5: The Lowdown on Salesforce Permissions

In Part 5 of our series Salesforce Administrator Guide: Propelling your Career Forward, let’s take a few minutes to discuss Salesforce Permissions. To be clear, Salesforce permissions run deep and wide, and you will eventually need to put in a decent amount of time to become an expert at this, however, today we’re just going to go over some basic terms to make sure you understand the gist of things.  Let’s dive in!


Image: OWD and Sharing Settings


Organization-Wide Defaults (OWD) - This controls the record level access for the entire org, on whether records should be privately viewed or not. For example, you may not want Sales reps to see each others’ Opportunities, so you can make the Opportunity object private.


Role Hierarchy - As you create users in Salesforce, you determine which Role they may be in, such as Sales rep or Services rep, for example. Specific roles can be nested under others, such as the Sales Rep, which looks up to the Sales Manager, which looks up to the VP of Sales. You can grant record access based on Role Hierarchies to ensure a Manager can always see his rep’s records. 


Sharing Rules - These are another way to work within the OWD you have set, to allow users to see certain records. You can set up Sharing Rules to work with Public Groups that you have established, in order to grant access to certain records with specific criteria. This is a great way to share records across departments.


Manual Sharing - Manual sharing is an option for individuals to share individual records. Maybe your sales rep only needs to share a record with the Service rep once or twice a month, and they only need to see one or two at a time. This would be a good way to allow record sharing without the setup involved for sharing rules.


Field Level Security - Also known as FLS, field level security is where you can allow certain profiles to have access to a field. You may find that some fields should remain hidden from lower level end users, or reserved for a specific department, such as Finance. This allows you to limit clutter and unauthorized permission.


Image: The Role and Profile are located on the User Record


Profiles - Each user record has a profile, which houses object and system permissions. These are separate from roles, in that these give what is known as “CRED” access: Create, Read, Edit, or Delete. This allows your user to take those actions on records, and should be thoughtfully considered before doling out. 


Permission Sets - The idea of Profiles is to give users that need the same permissions their access in a way that’s easiest for you as an Admin. You simply don’t want too many profiles. However, you may find that there are permissions that may be needed for a select group of users that are very specific to an object or setting that others should not have. A permission set can be created and added to the user record to grant that access.


That’s a lot - and only scratching the surface. If you’re looking for a pretty awesome trailhead on this topic, check out the Data Security module.


Wednesday, 19 August 2020

[#Blogged] - Salesforce Administrator Guide: Propelling your Career Forward - Part 4

 We all love Salesforce, but one of the most confusing things about Salesforce may be trying to navigate through all of the places to find what you’re looking for. It can absolutely drive you crazy to see a record or a setting, and find yourself unable to locate it once more, just a few minutes later. Well, I’m here to help you sort it out! In Part 4 of my series Salesforce Administrator Guide: Propelling your Career Forward, I’m going to talk about how to navigate through Salesforce efficiently and some things you can do to make it fit nicely into your daily tasks. 


Part 4: How to Navigate through Salesforce Efficiently

Setup Menu: How to get there and how to use it

The Setup menu is where you essentially, as an admin, control the ‘backend’ of your Salesforce instance. This is where page layouts, user permissions, and other tools are easily available for you to access and customize. 


In order to access your Setup menu, you must select the Setup ‘wheel’ in the top right corner of your layout. You can then select Setup.


Once you select Setup, you are taken to the Setup screen, where you’ll see a tab called “Home”. The Home tab is where you can use the Quick Find search bar to locate the Lightning App Builder, Profiles and User records, as well as anything else that may require setting up or adjusting.


Under Setup, there is also a tab called “Object Manager”, which houses each Salesforce object, both standard and custom. You can then select the object and access information specific to each one, such as page layouts and record types, fields for each object, and even validation rules. This is also where you would create any new custom fields for that object, as well.


The App Launcher: What does it do?

While Setup is the ‘backend’ of Salesforce, the Apps are what your end users will have the most access to, and how you navigate through customer data. Apps are collections of tabs and objects, which contain collections of records. For example, you may have two teams, such as Sales and Services, with different needs. Sales may need to see Accounts, Opportunities, and Leads, but Services may need to see Cases, Accounts, and Reports. You can create two different apps to prevent them from too much clutter on their screens. They each can navigate through their tabs, and learn that to get a list of recently visited accounts, they can select their Accounts tab for that list view. 


If you’re in Setup, but need to navigate back to records, you will select the App Launcher icon in the left corner. From there, you can select the App you’re looking for, or even just search for a specific tab, such as “Accounts”.


Understanding how to navigate between those two worlds of Salesforce will make a huge difference in your day to day functioning. Take time to explore Setup a little more, and you’ll be a whiz in no time!


Thursday, 6 August 2020

[#Blogged] - Salesforce Administrator Guide: Propelling your Career Forward - Part 3

Part 3: 3 Benefits of Joining Community Groups 


So, you’re focusing on furthering your Salesforce Admin career -- that’s great! It’s easy to get inundated by everything Salesforce has to offer, and the pressure to “keep up” with it all. But just relax! You’re not going to learn it all in a day, and there is more to your Admin career than the hard skills themselves. There is a whole network of others who are following the same path as you, and others who have gone before. Why not tap into that network to help you stay on top of your Admin game? 


If you have not heard about Community Groups, you’re in for a treat! This does not mean “Community Cloud” groups, but rather user groups of Salesforce professionals in your area. They are a great way to connect with others locally, and can provide resources to help you along this journey you’re on. They usually meet pretty regularly, and offer events such as webinars, and “Salesforce Saturdays” where you can meet and work through your Salesforce issues together. If you’re stuck on a major issue, collaborating with others who have a variety of experience can help you think outside of the box and find that perfect solution you’re looking for. The positives of the Community group doesn’t just stop there - read on to see more benefits and how to sign up today! 


3 Benefits to Joining your Local Community Group


  1. Access to local Events - This is a huge benefit. It can be easy to get caught in your bubble of work, and the next thing you know, you’re not really expanding your horizons. Local events can range from guest speakers, to local companies offering apps on the AppExchange to explorations of new features. And they’re tailored to a smaller crowd, which can give you a chance to ask those important questions.


  1. Find a Mentor - Especially when starting out as an admin, it can feel like you’re not sure of the path you’d like to take or even where to get started at times. Finding a mentor can be a great way to work with someone from your area who understands the local industry and can offer advice on the best ways to propel yourself forward.


  1. Networking with Others - Your local community group also allows for connecting with others nearby, as well. These connections can be great for future career options and building relationships early, as you stay in touch over the course of your growth. You can also find awesome people to join your team, as well. 


How to Sign Up

To find out more about your local Community Group, login to your Trailhead site, and navigate to the “Community” drop down, where you can see “Community Groups”. 


Once you’re there, you can easily Sign up and search for the city you live in (or one near you) to see about events they’re hosting. Signing up only takes 30 seconds, and you’re in!


This is a great opportunity to help you expand your growth as you’re on this journey of being a Salesforce Admin. What are you waiting for?!? Go Join today!


Thursday, 30 July 2020

[#Blogged] - Salesforce Administrator Guide: Propelling your Career Forward - Part 2

Part 2: Basic Admin Skills to Master in Salesforce

In Part 1 of my series for Salesforce Administrator Guide: Propelling your Career Forward, I discussed things to consider as you pursue your Salesforce Administrator Certification. Here, in Part 2, I want to discuss Basic Admin Skills to Master in Salesforce, whether you already have your certification or it’s a work in progress. If you’re looking to challenge yourself, make it a goal to become more proficient in each of these areas by the end of the year, focusing on one skill every few weeks. Before you know it, you’ll be an efficient Salesforce ninja, ready to tackle new ideas and help your company in ways you never thought possible! Let’s get started!


  1. Creating New objects - As intimidating as it sounds, understanding how to create a new object in Salesforce is a crucial skill you can use as your company continues to grow. Furthermore, with solid knowledge of when it’s appropriate to create a new object, you can help guide solutions to use the best feature for your needs. 

  2. Reporting & Dashboards - This is the bread and butter for management and how they analyze the health of your company and your customers. Get some practice slicing and dicing with different report types, how to summarize a report, and how to manipulate data within the report. Also, explore dynamic dashboards, and practice by assembling a dashboard that could be useful for your Sales team. You’ll be a hero for mastering this skill!

  3. Permissions - As scary as permissions can be, understanding them is crucial for keeping your org in great shape. Make sure you know what Organization Wide Defaults are, and how to use Profiles, Permission Sets, and Field Level Security. Permissions “make or break” so much in your org, from reports, to process flows. This is worth a large investment of your time, and one I highly recommend learning sooner rather than later.

  4. Creating Fields - Understand how to create a custom field, and how those fields differ from Standard Salesforce fields. There are so many different kinds of custom fields, so make sure you play around with each one. This is where it really gets fun, as you can explore which ones are your favorites, and it may spawn some ideas on current projects you’re working on. 

  5. How to Set up a User - Make sure you are comfortable creating a user, and understand the license types you have and the limits of each one. Learn the difference between Freezing a user and Deactivating, and the implications of deactivating a user when they own records. 

  6. Data Cleanup - Knowing how to clean up your data is a really important skill that seems to elude a lot of admins. Learn some best practices you can recommend to your org, and how to backup data with dataloader and also, mass update data. It’s also important to understand what it means to export data, and who should have those permissions. 


As an admin, with these skills under your belt, you’ll be on your way to furthering your career in no time!